Create an Application Template
An application Template defines how your application will run, including environment variables, resource requirements, and scaling settings.
1. Open the "Templates" Section.
Inside your Project, navigate to Templates tab.
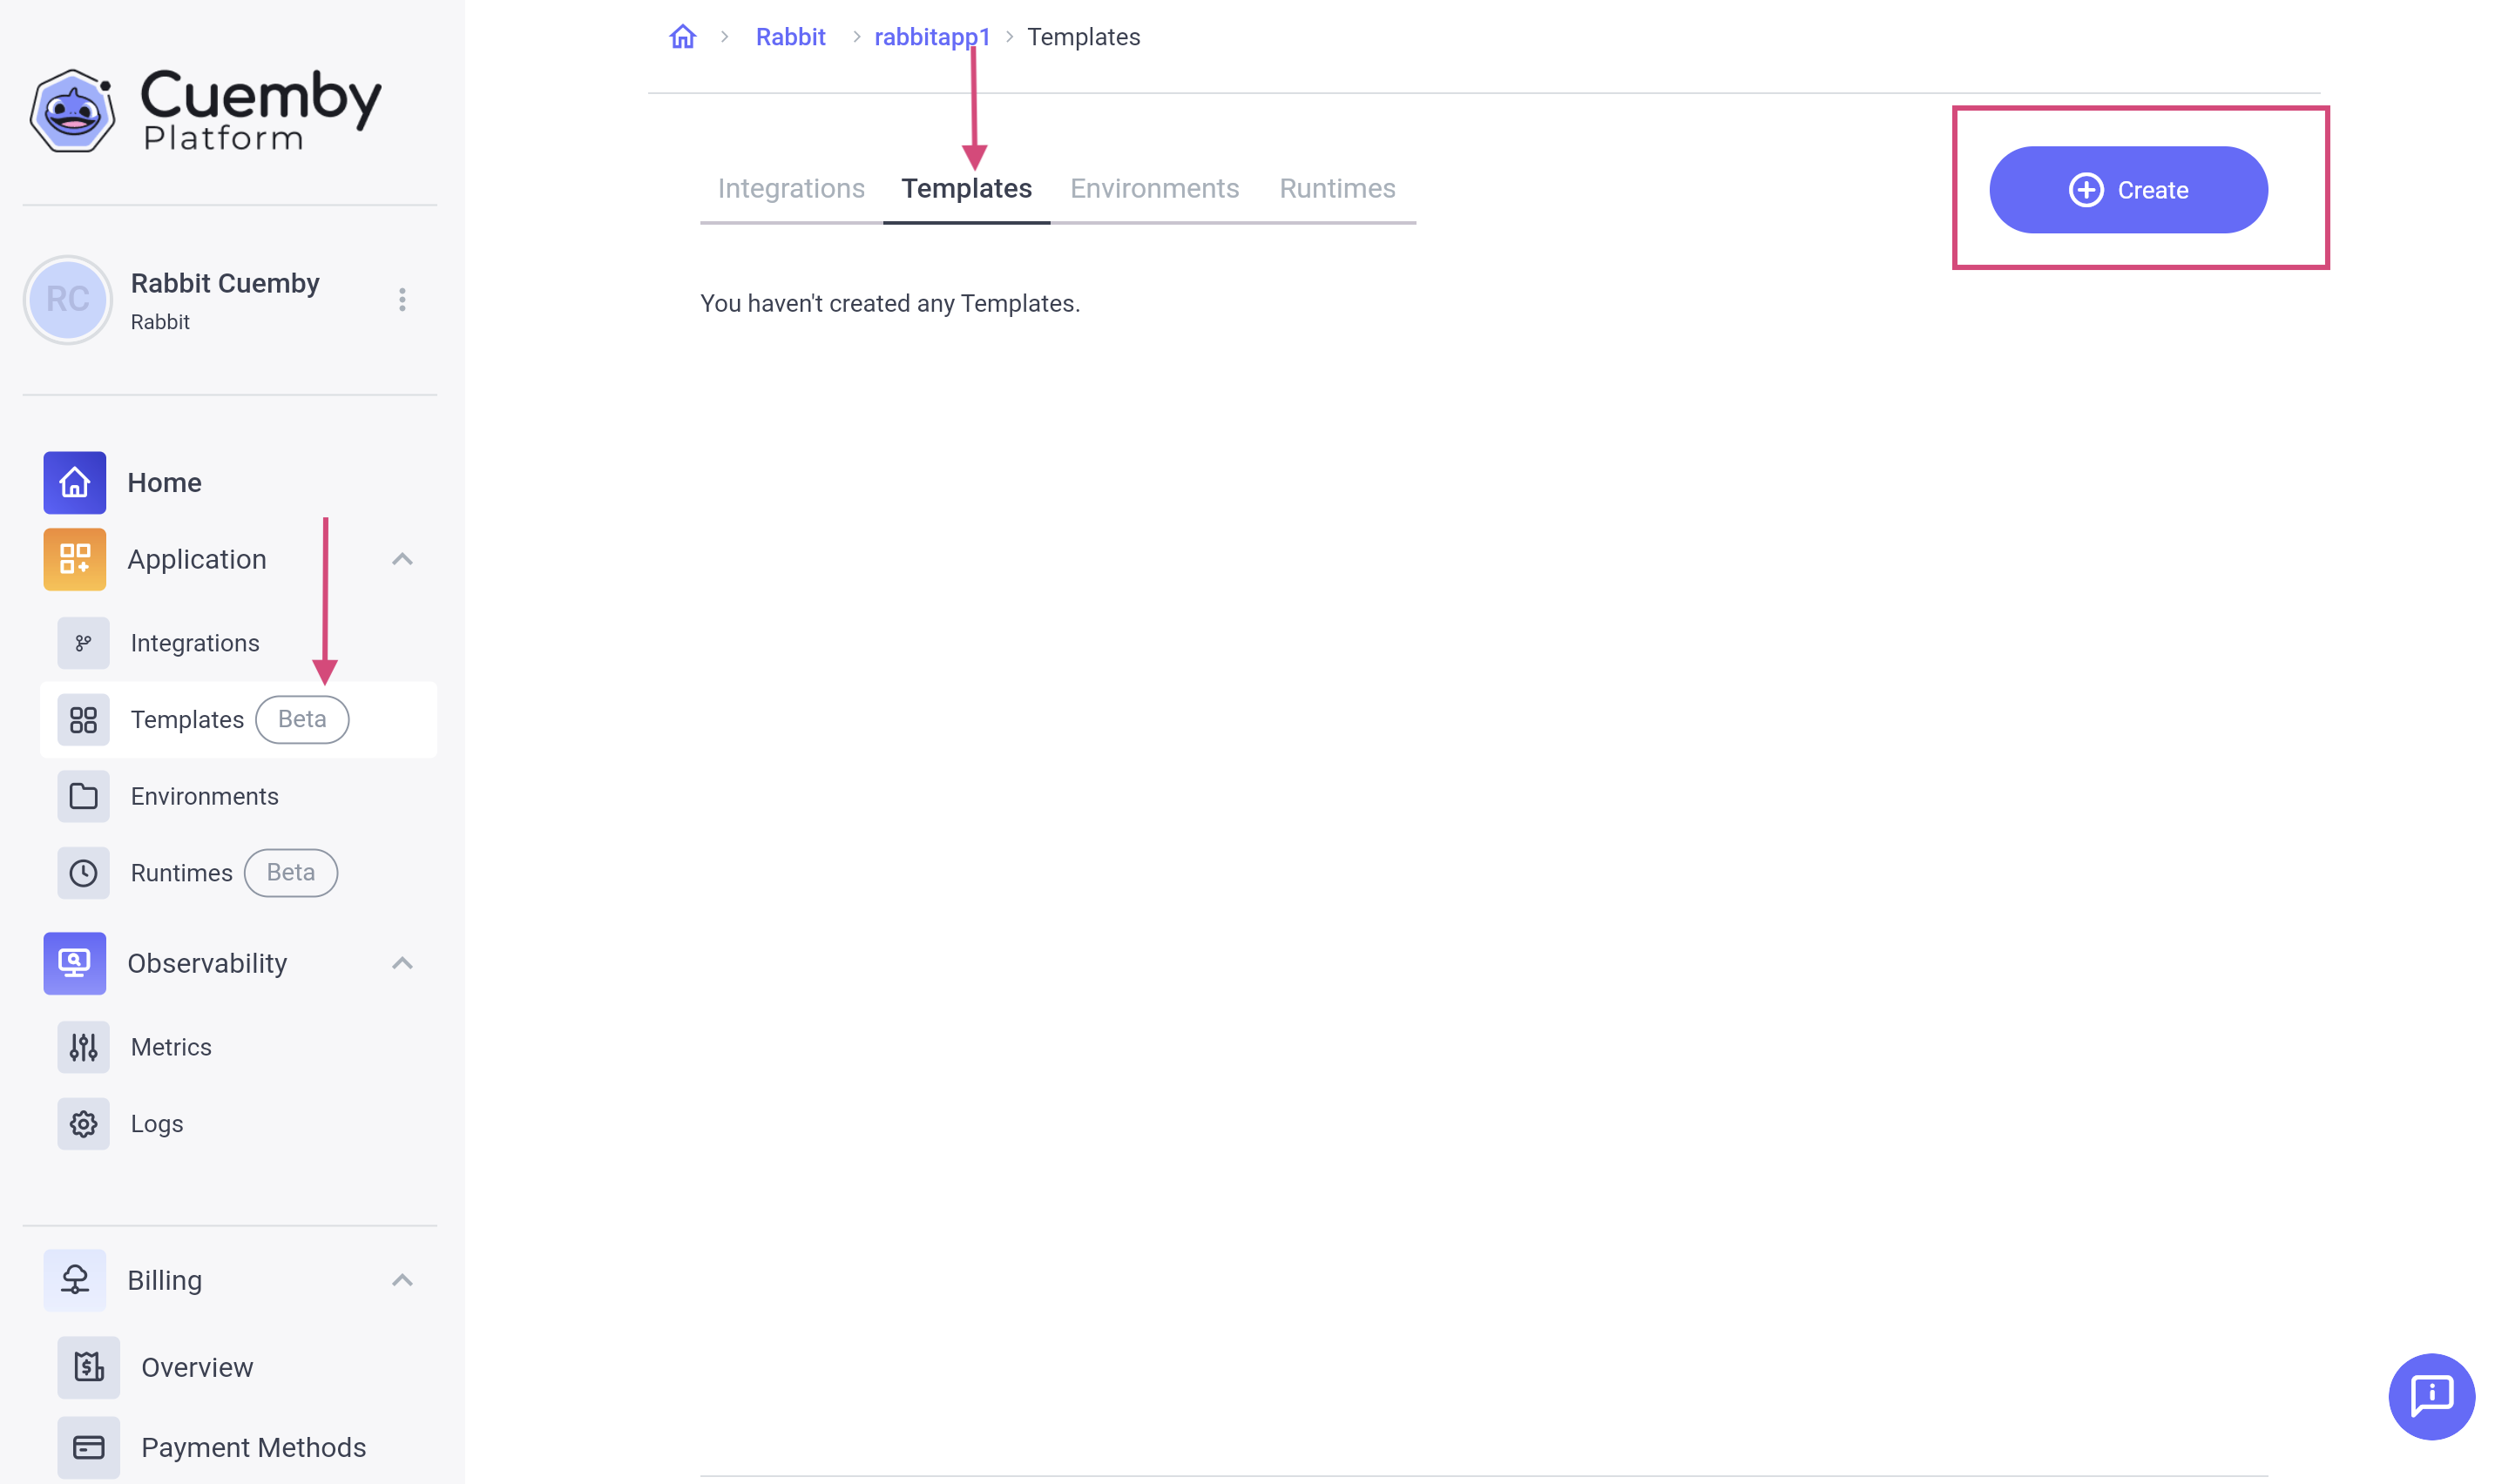
Click "Create."
2. Fill in Template Details.
Template Name – Enter a name for your template.
- Allowed: Lowercase, numbers and dashes (-).
- Not Allowed: Uppercase, spaces and special symbols.
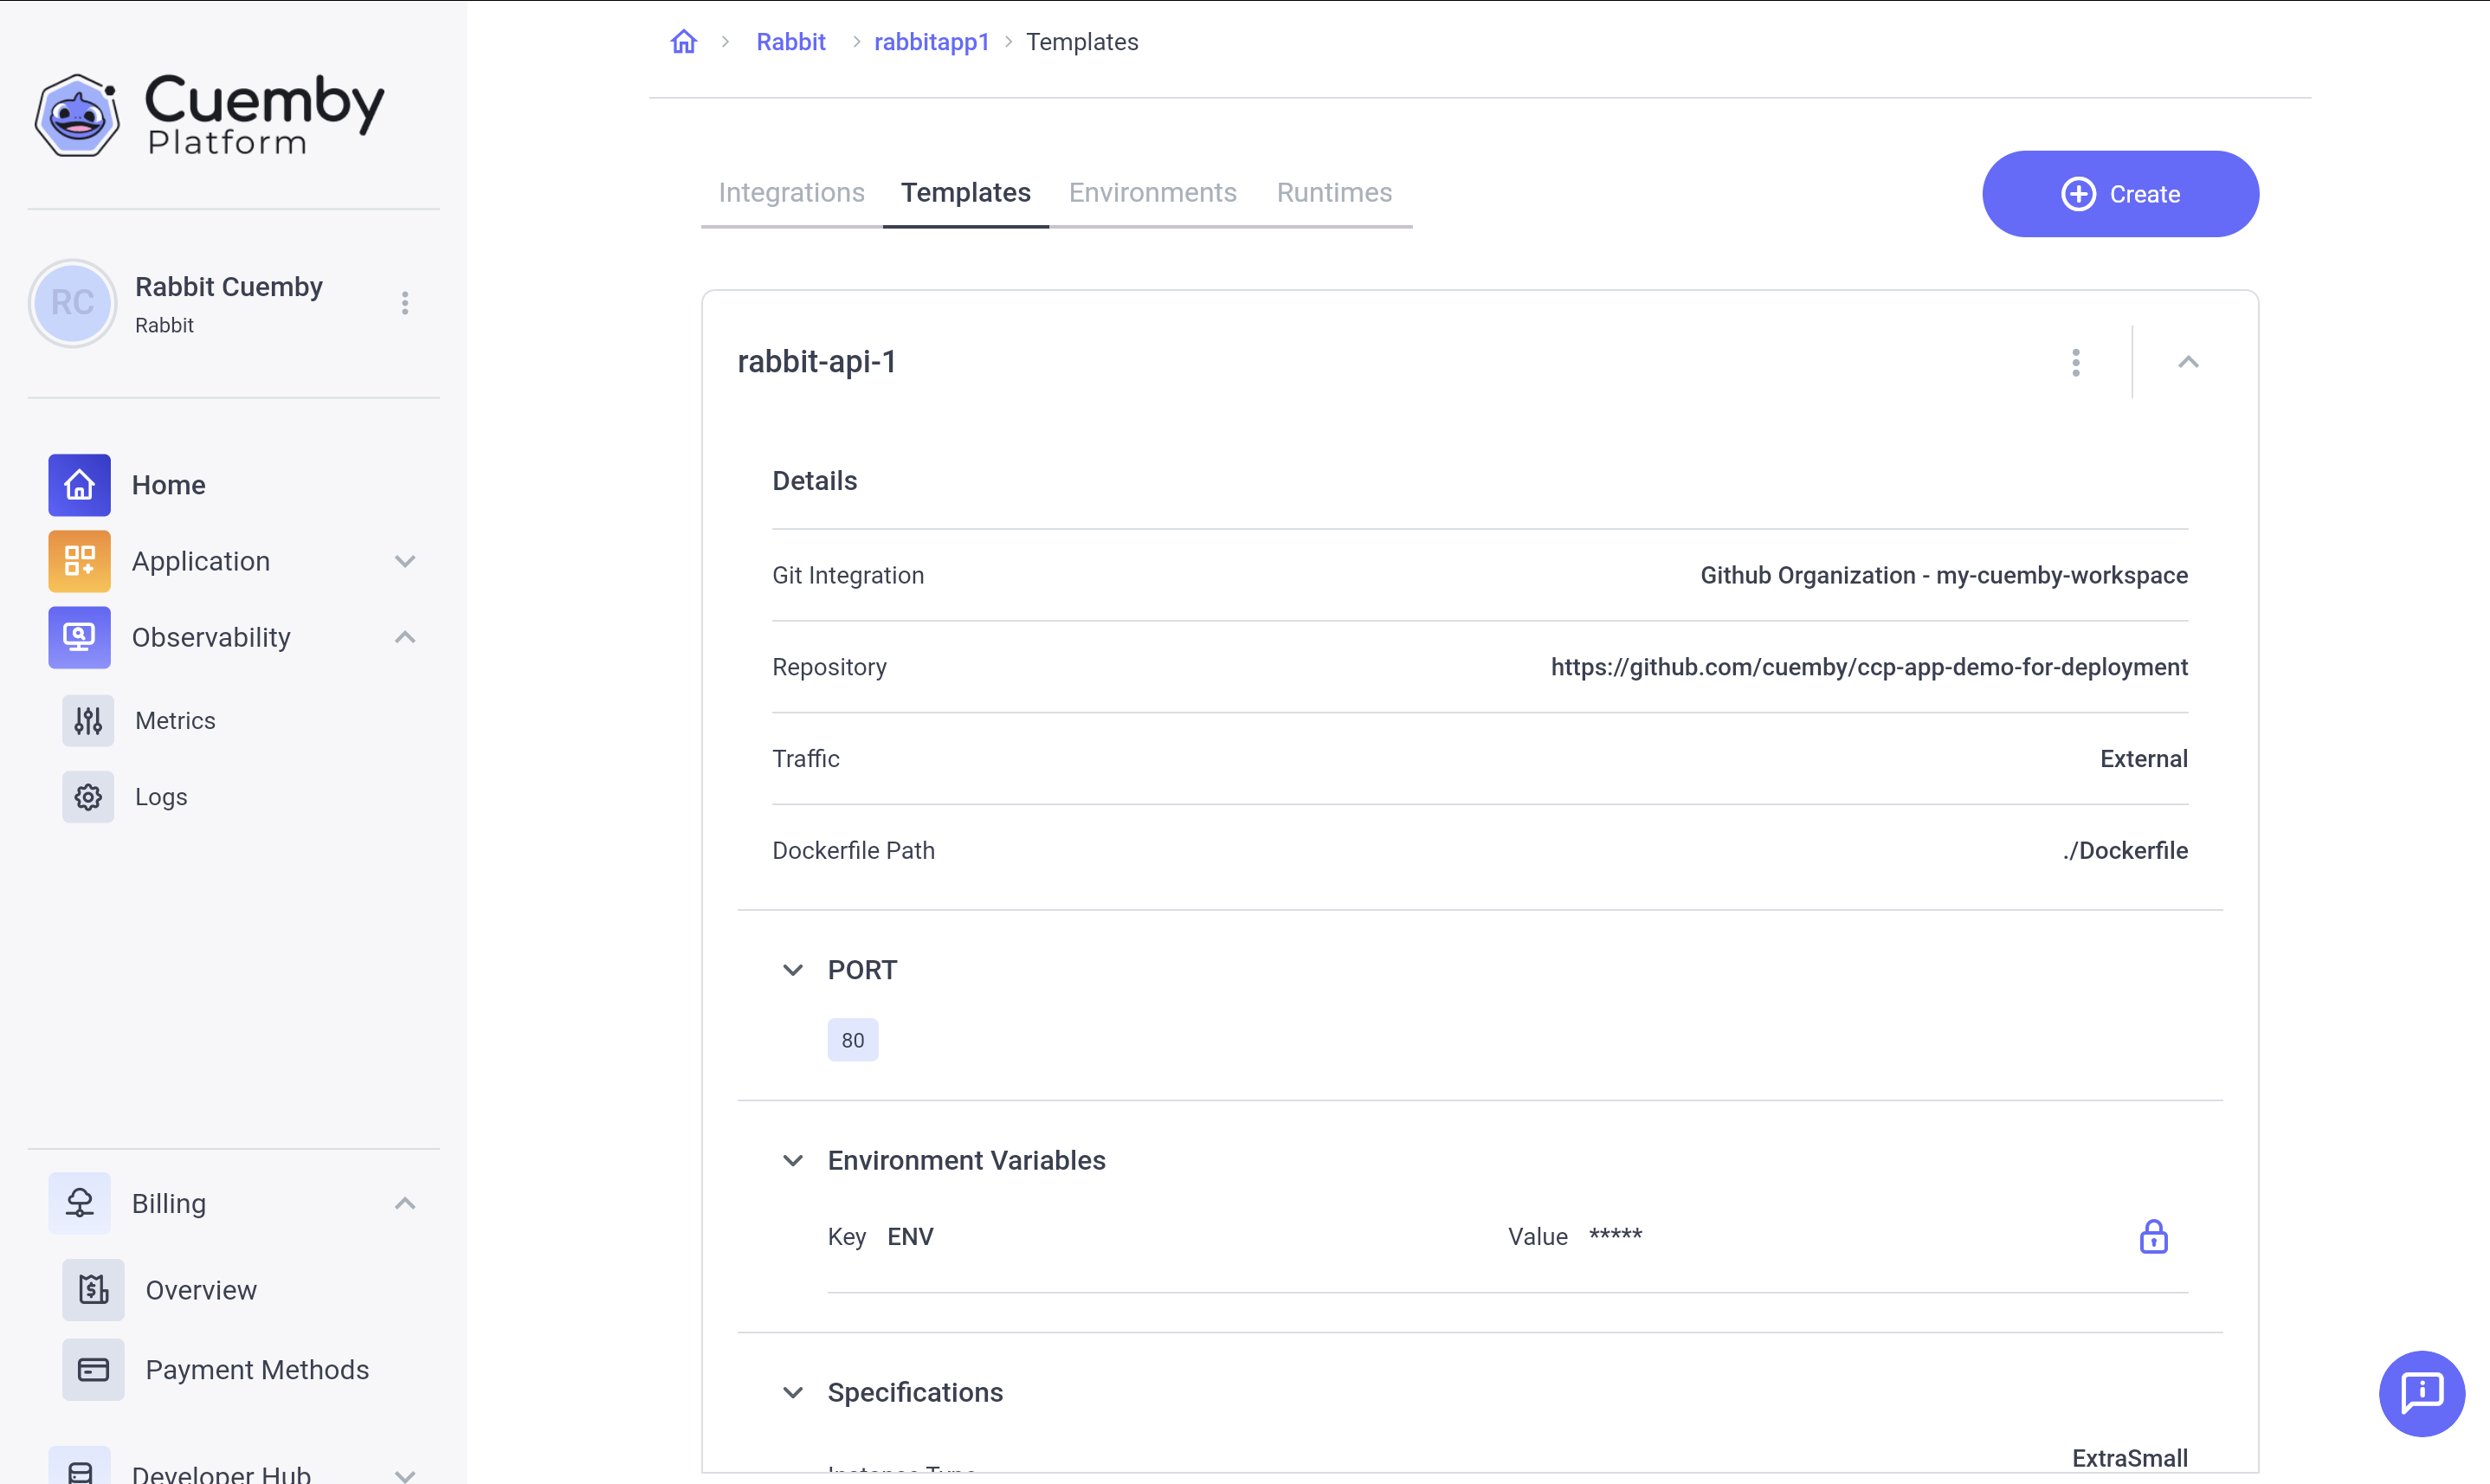
Git Integration – Select the Git provider you integrated earlier.
- The integration is the name of the connection you established previously with the GitHub / Gitlab. You can only select from integrations created under the same Organization or personal account.
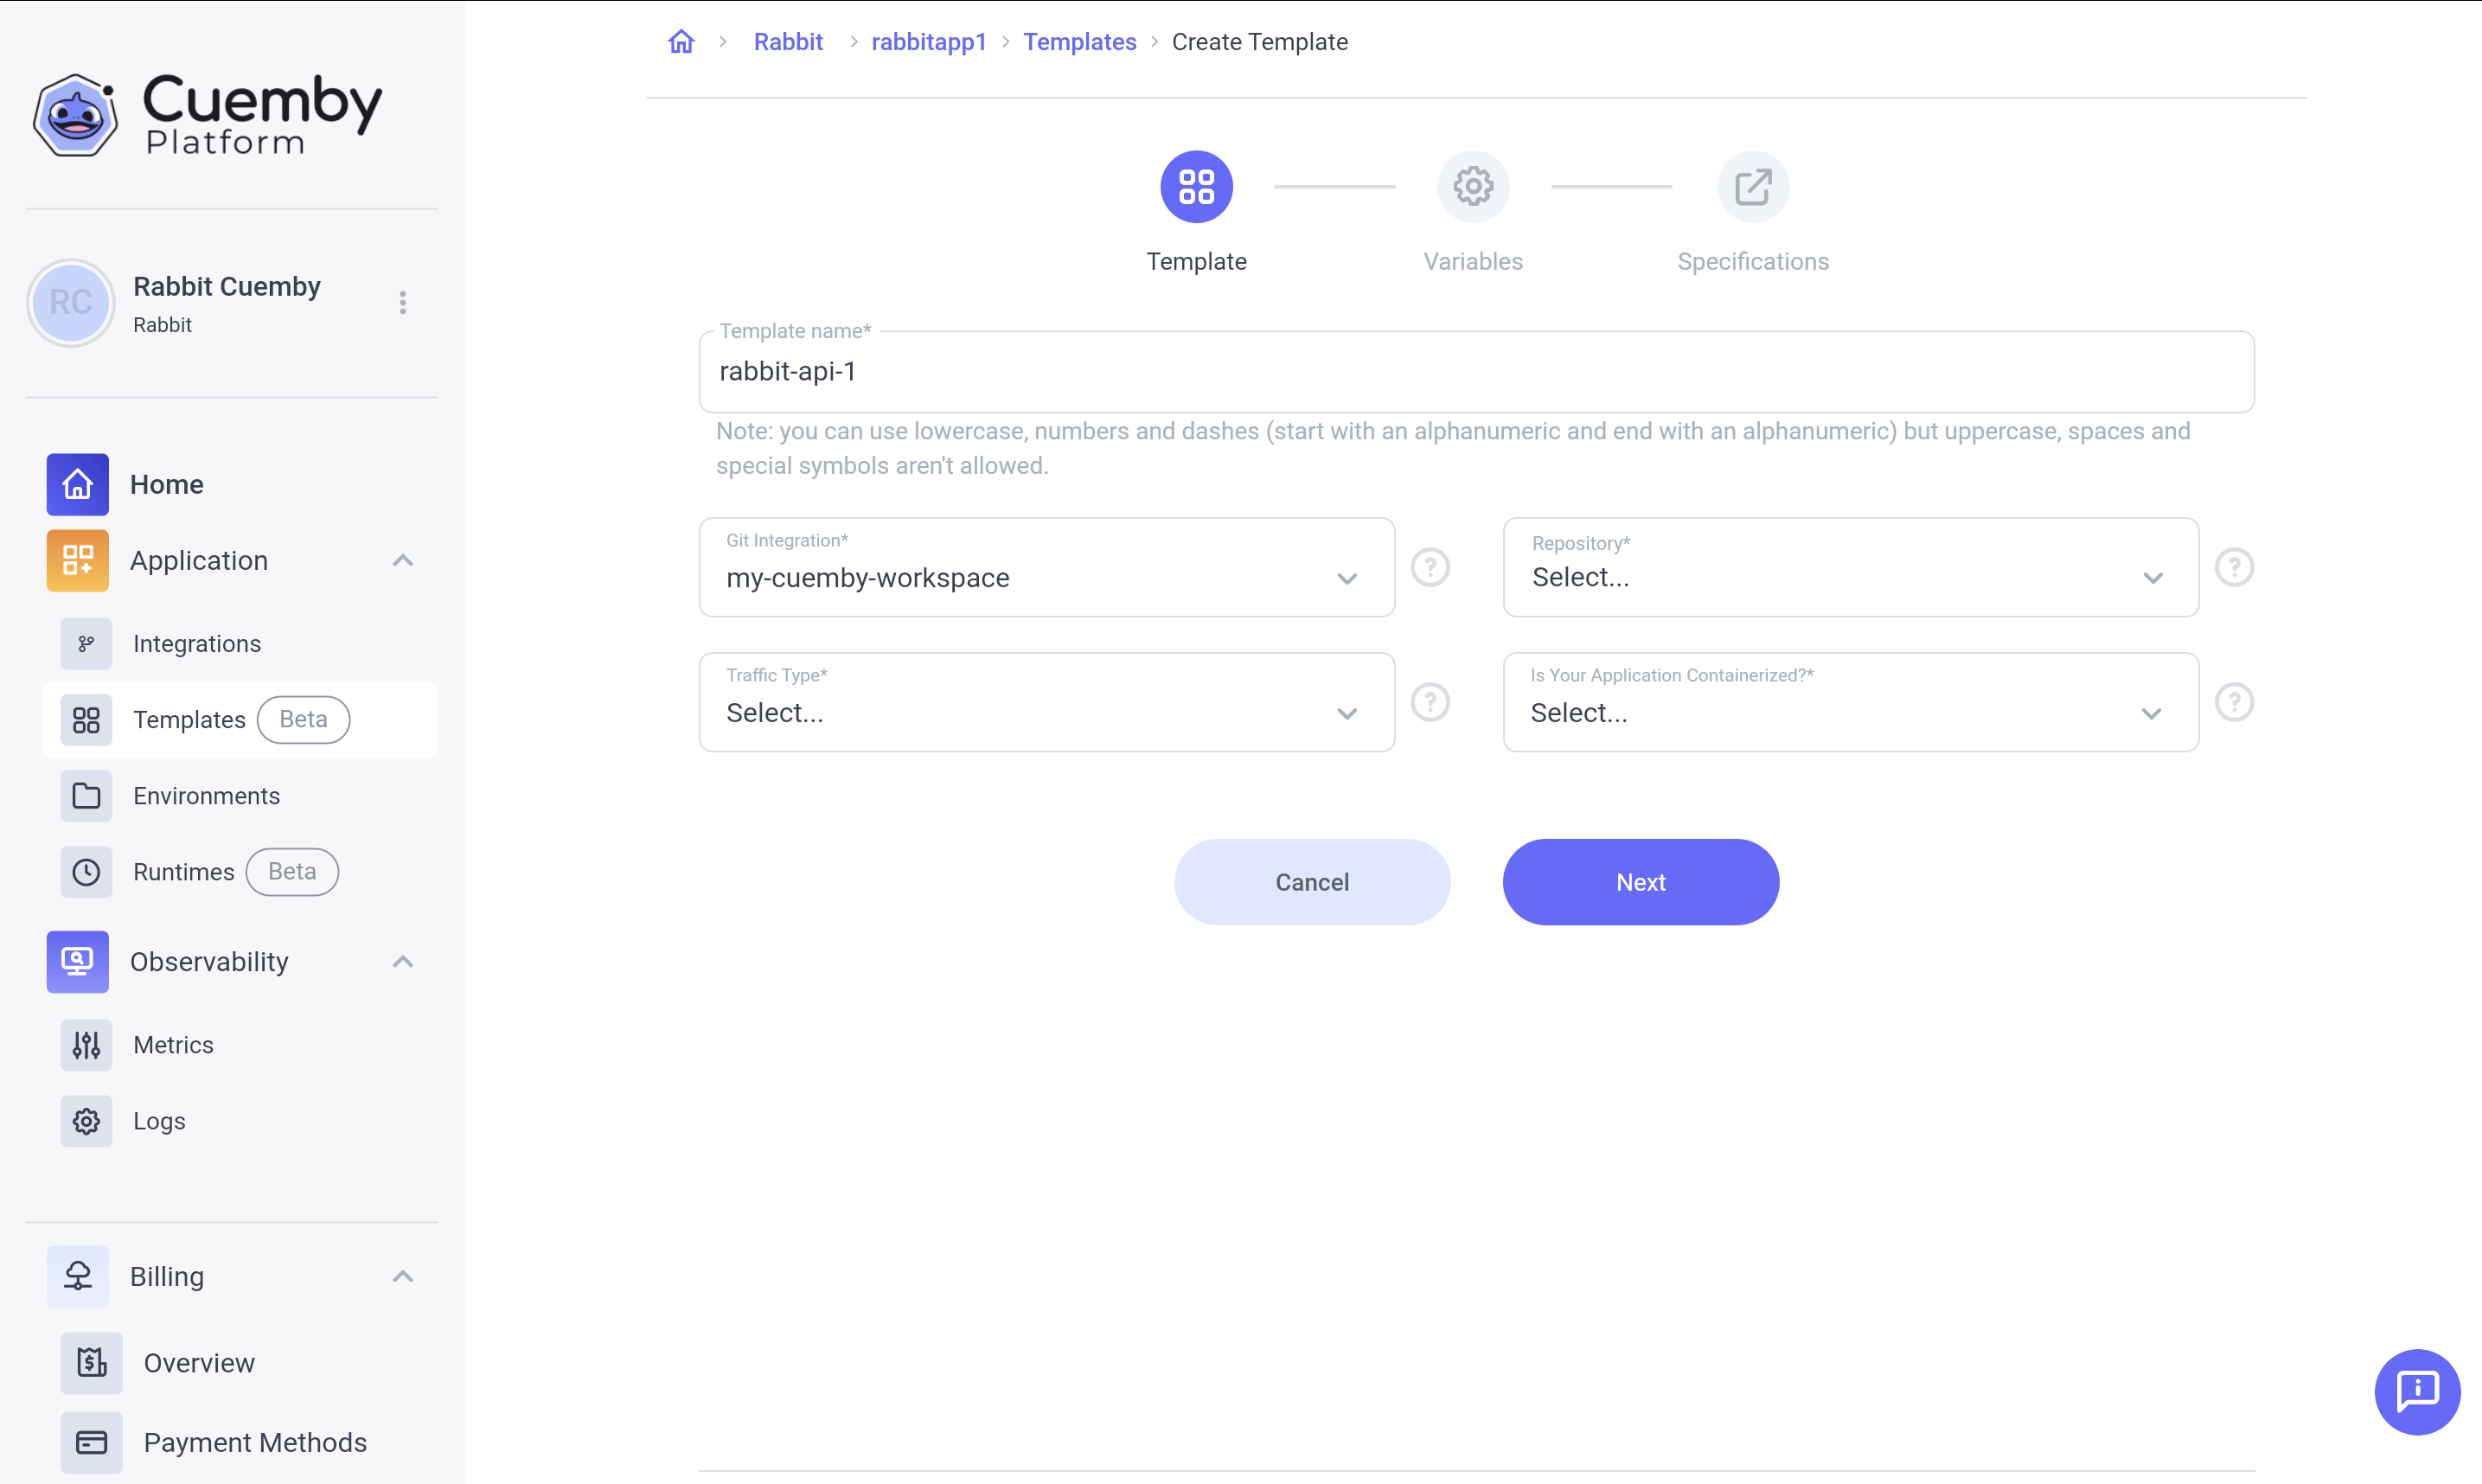
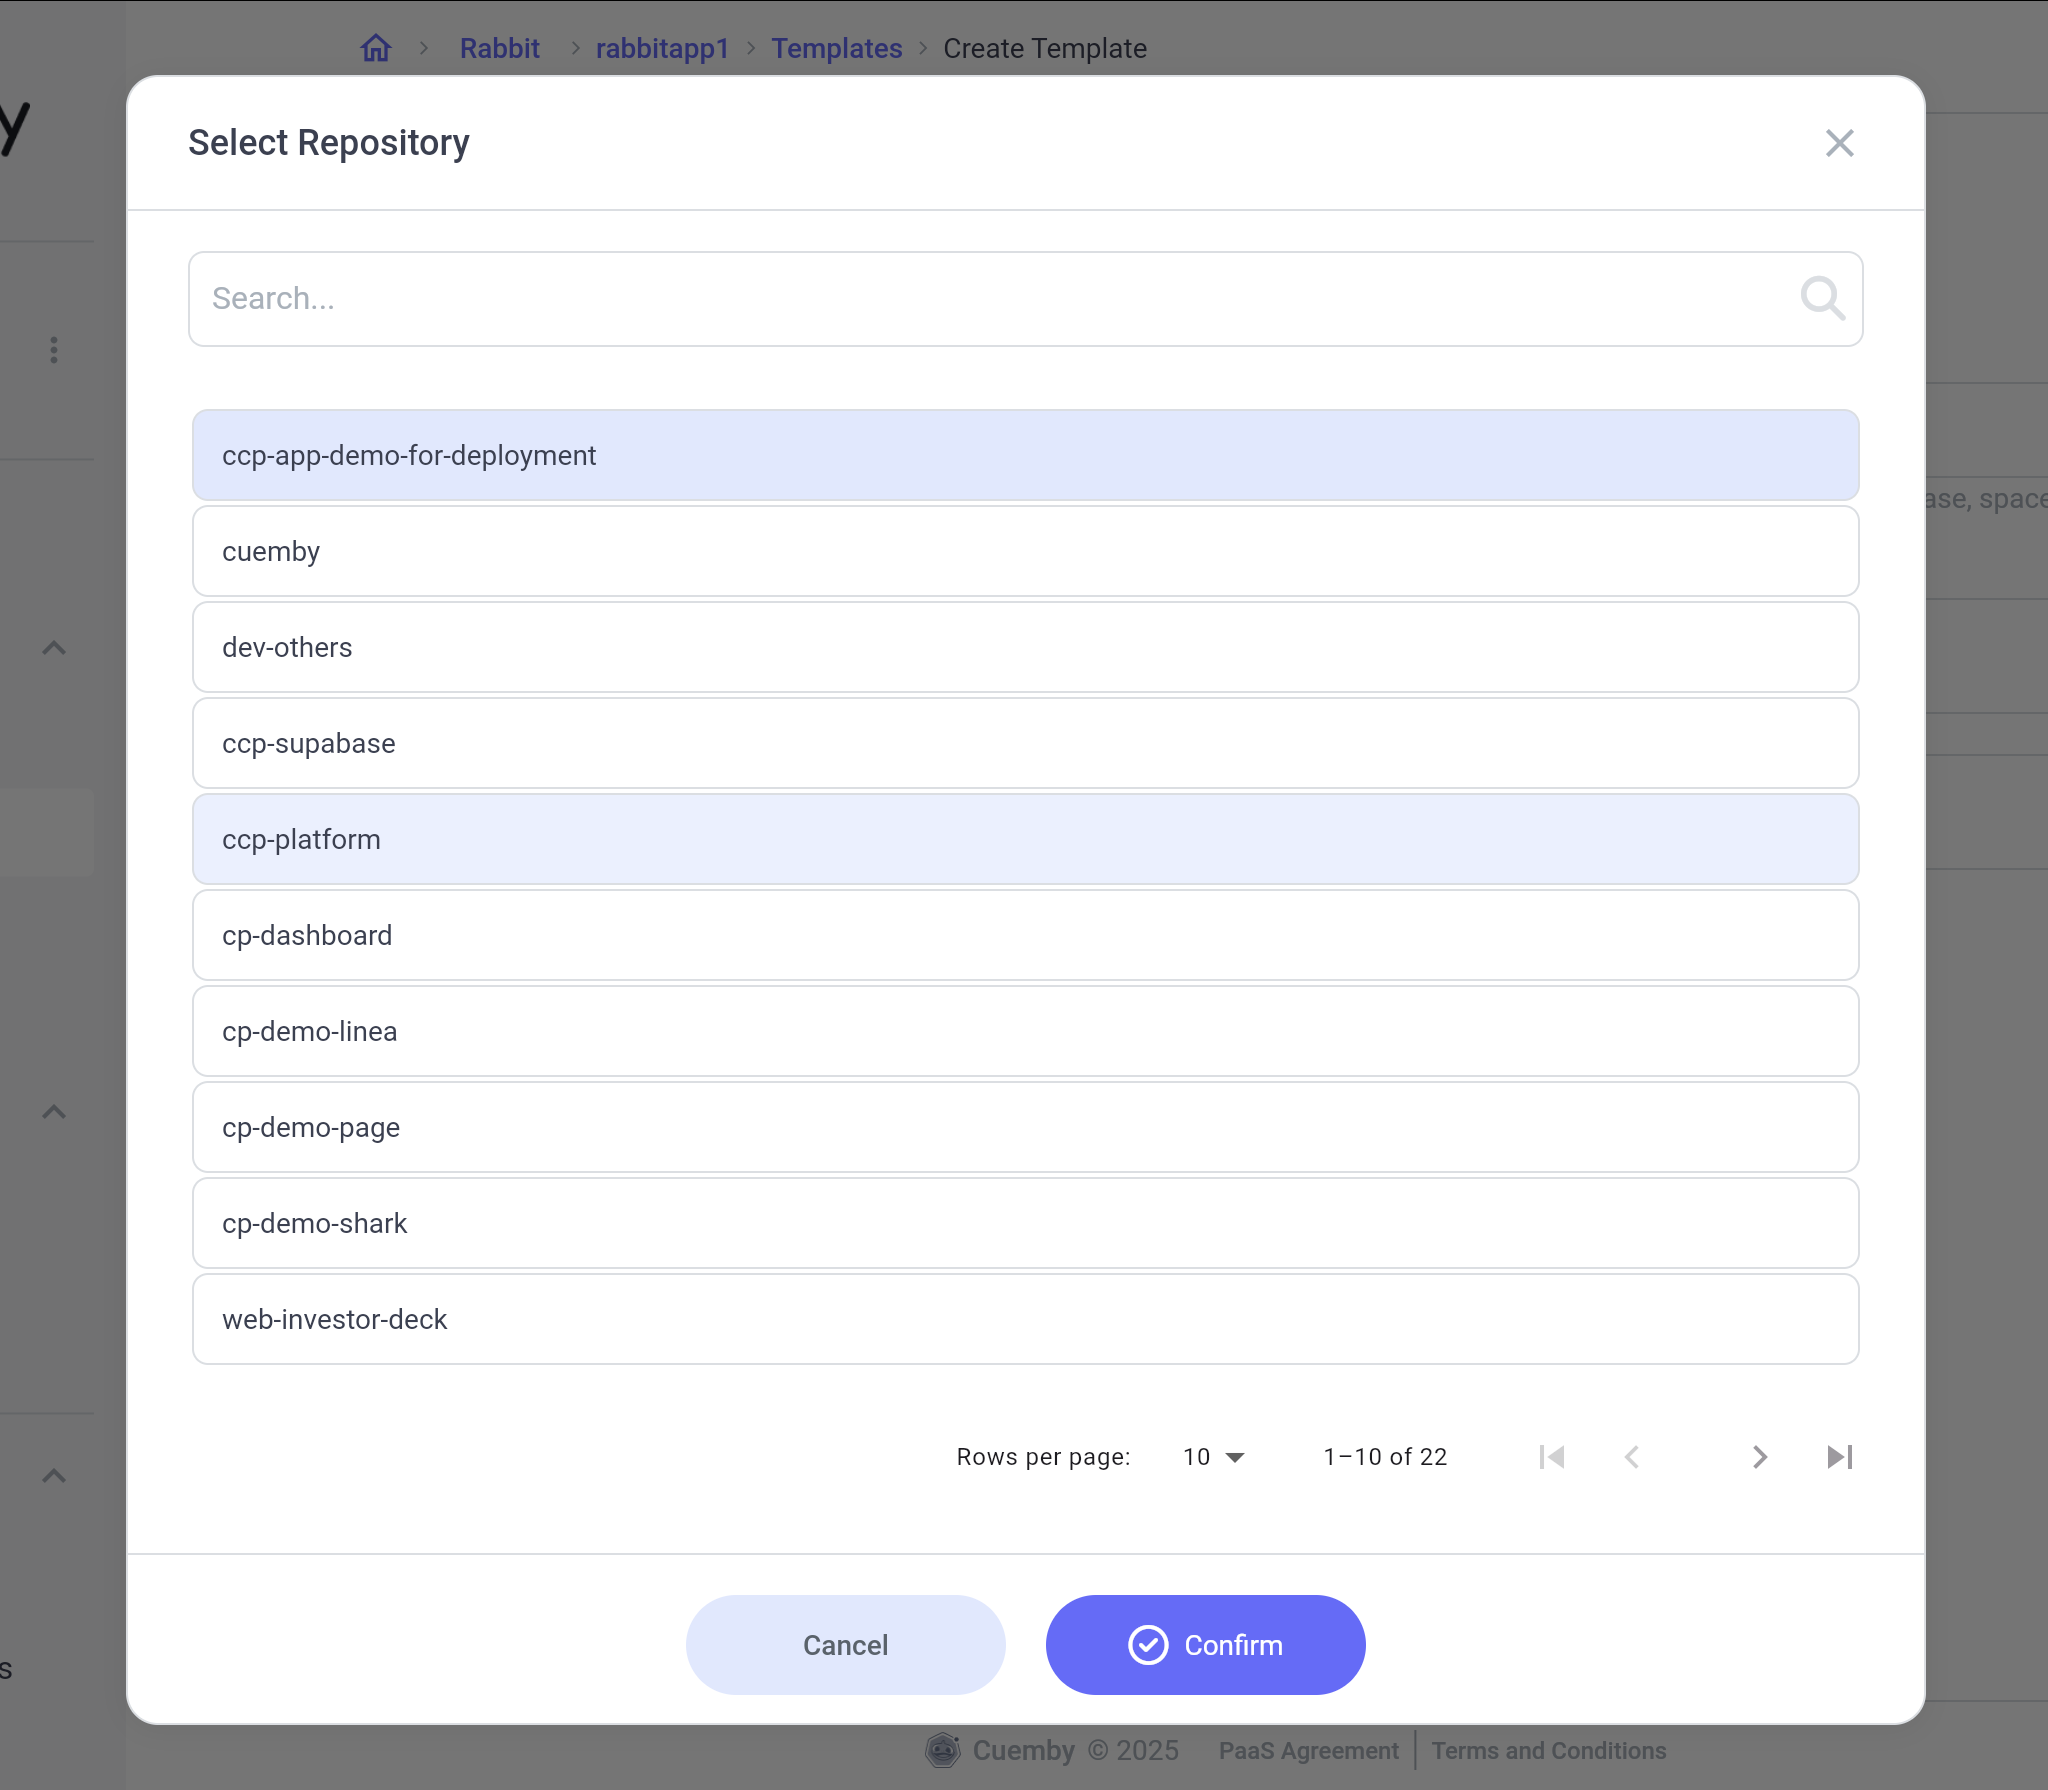
Repository – Select the repository that you want to deploy.
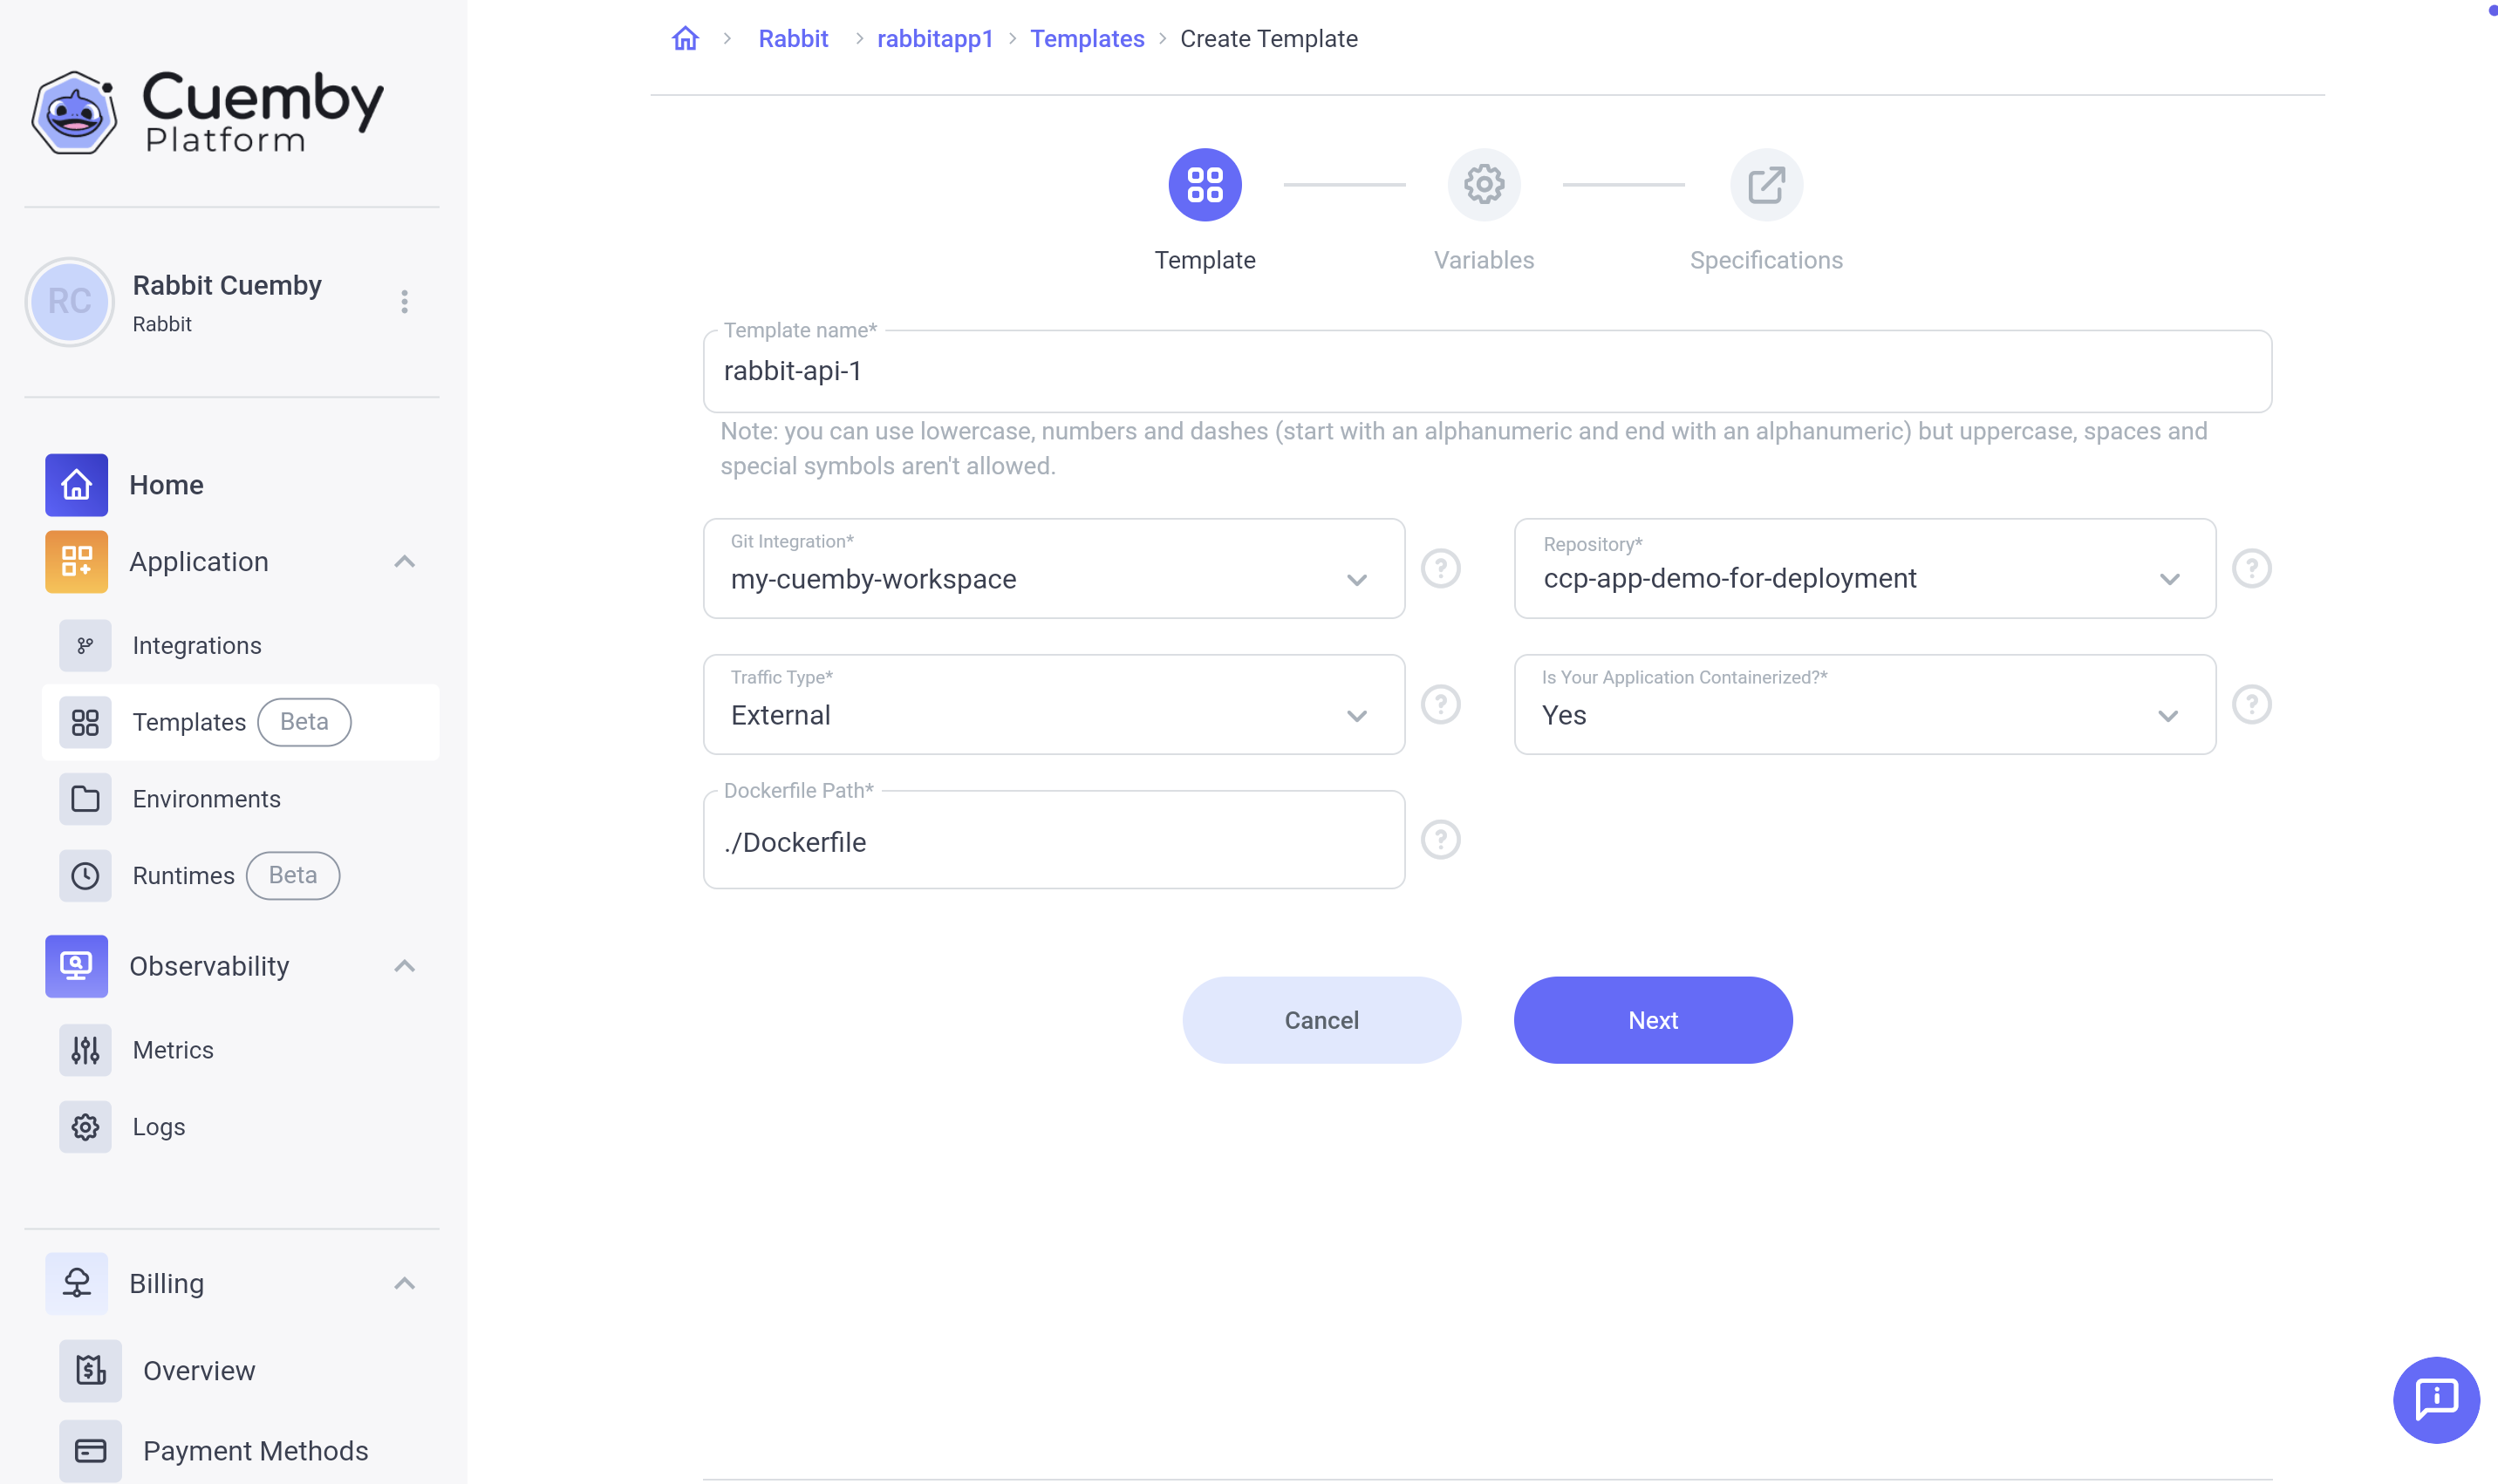
Traffic Type – Choose how your application will interact with traffic:
- Internal: Select this option if your application only services other applications within the same project. In this option, Cuemby Platform generates an internal DNS endpoint to be consumed at the cluster level.
- External: Select this option if your application needs to be publicly accessible. Cuemby automatically manages ingress certificates, ensuring secure traffic flow and auto-renewing certificates.
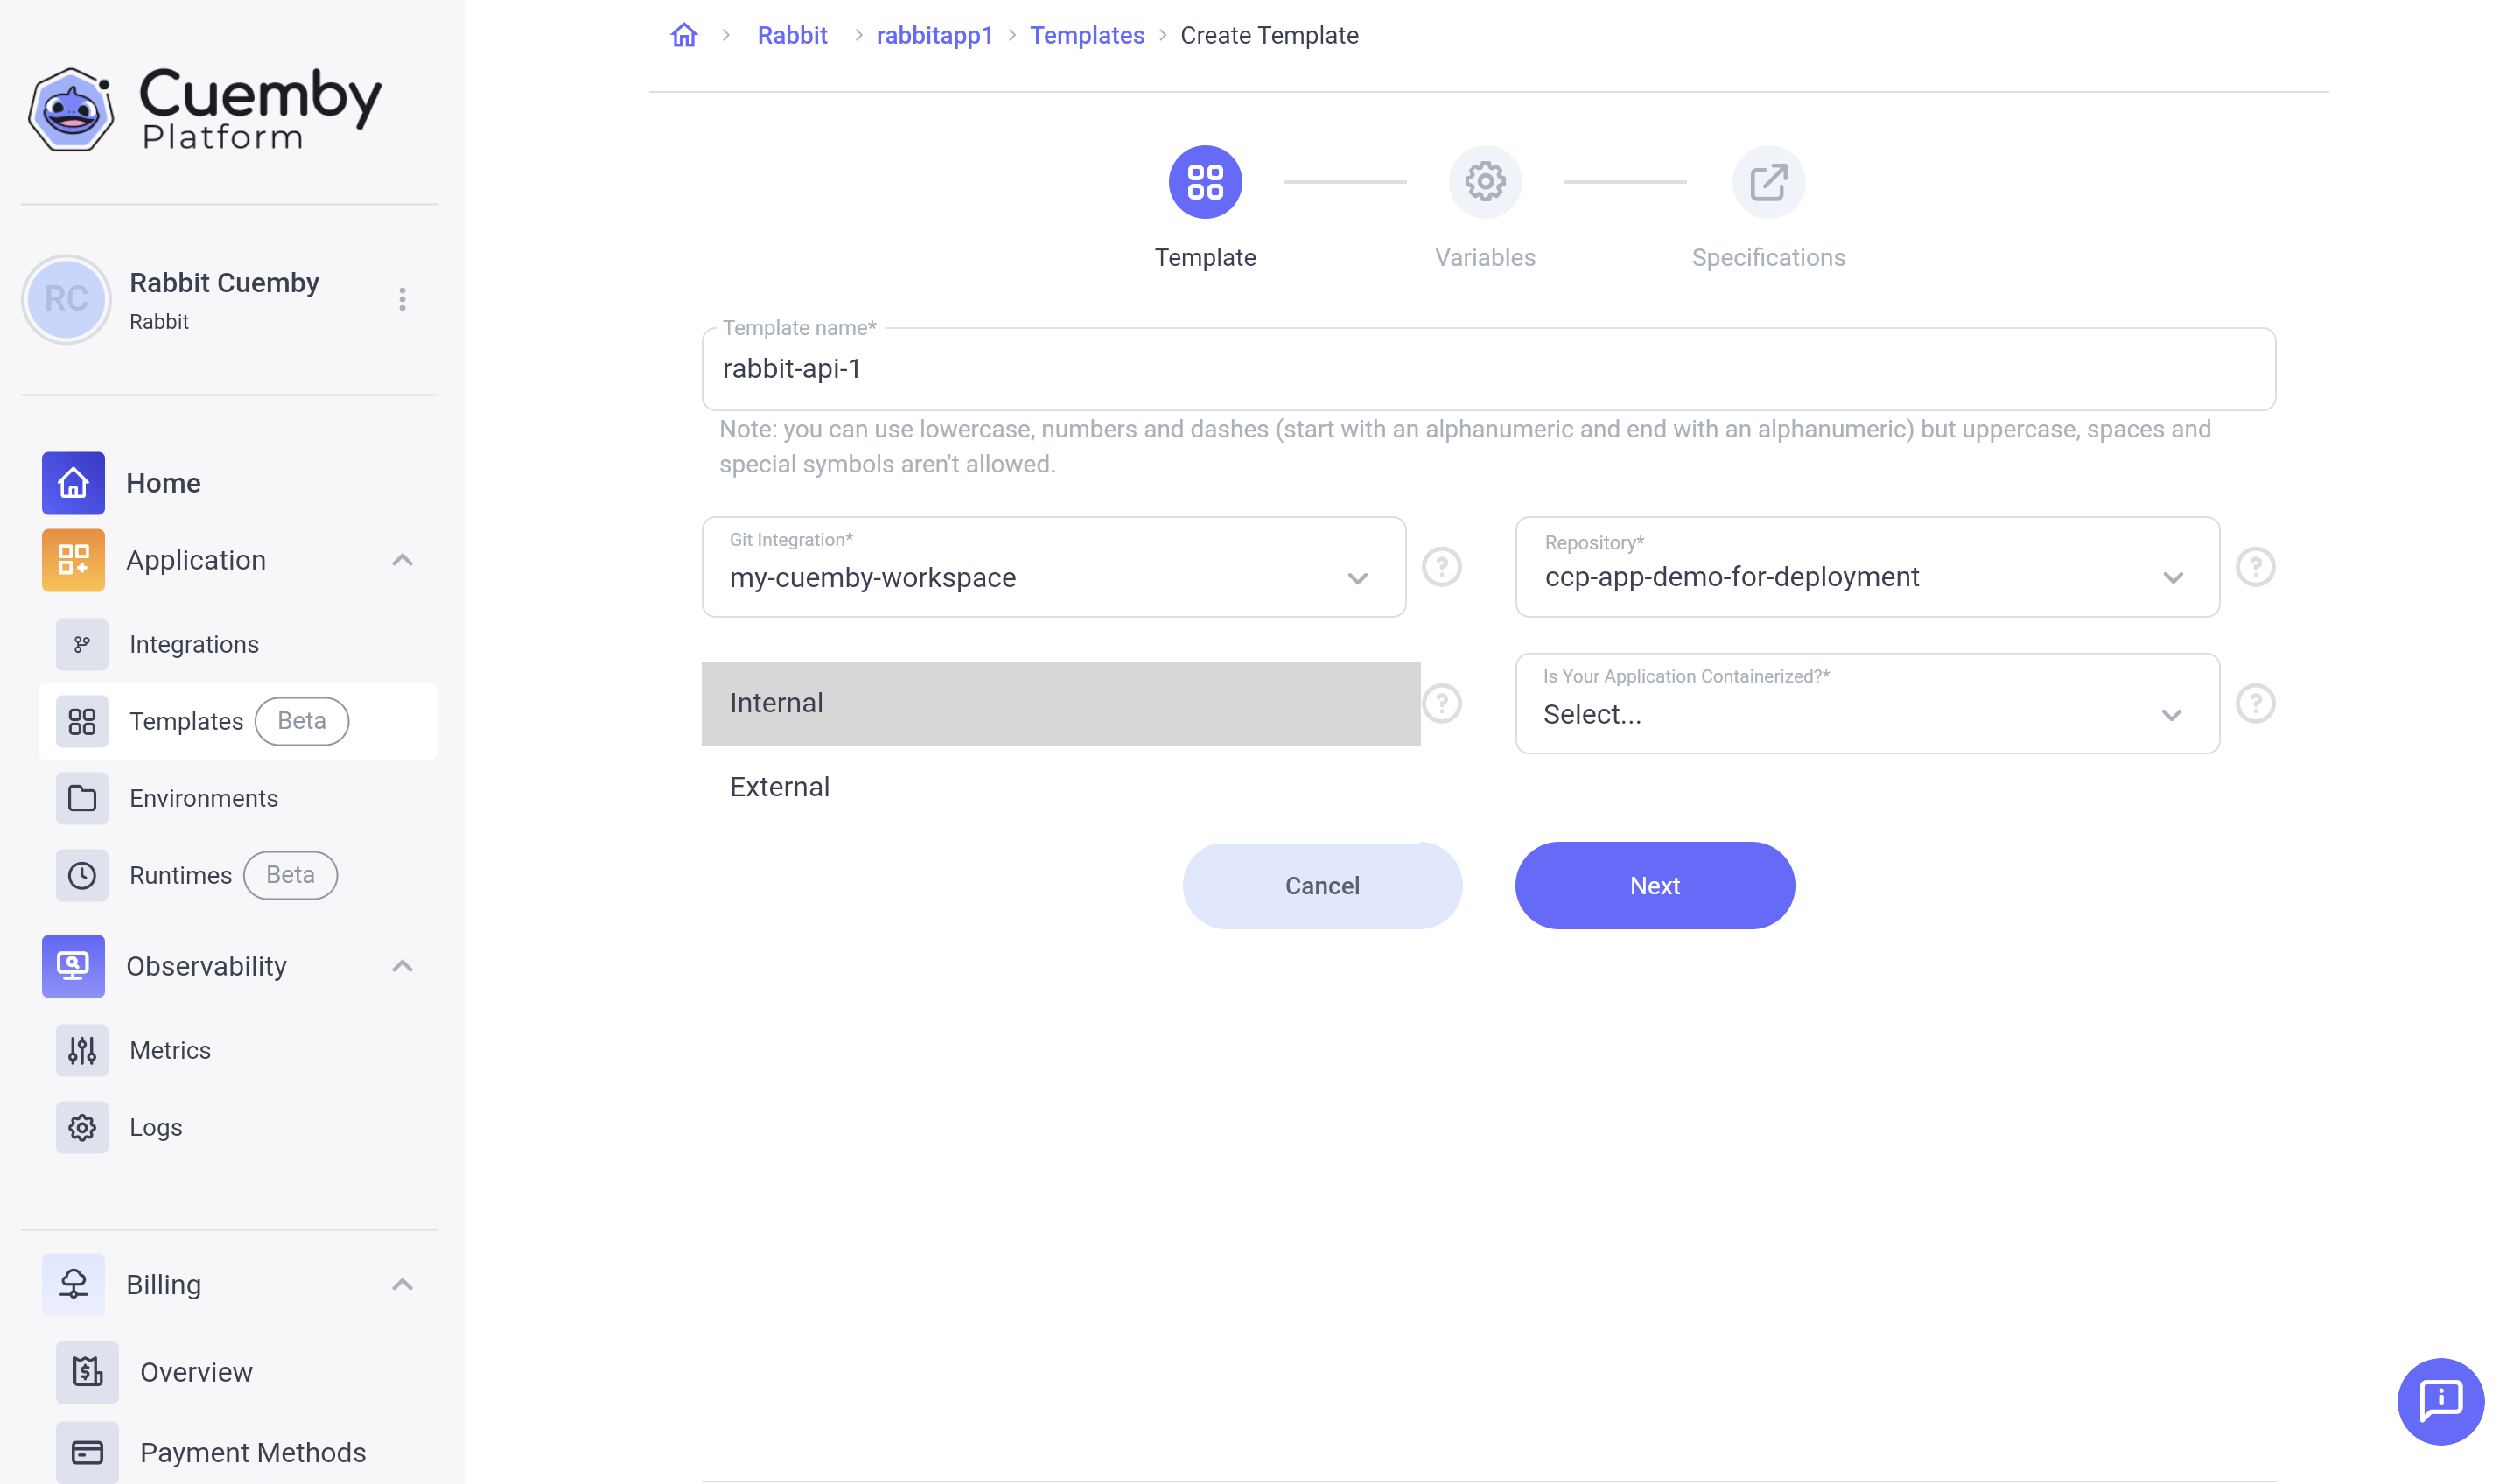
Is this Application Containerized?- Select YES if your application is containerized. Select NO if your application is not containerized.
Dockerfile path(Only if containerized)- Enter the Dockerfile path (./Dockerfile as default).
Source Code Language (Only if NOT containerized) – Select the programming language of your source code:
- Node.js
- Python
- Java
- Golang.
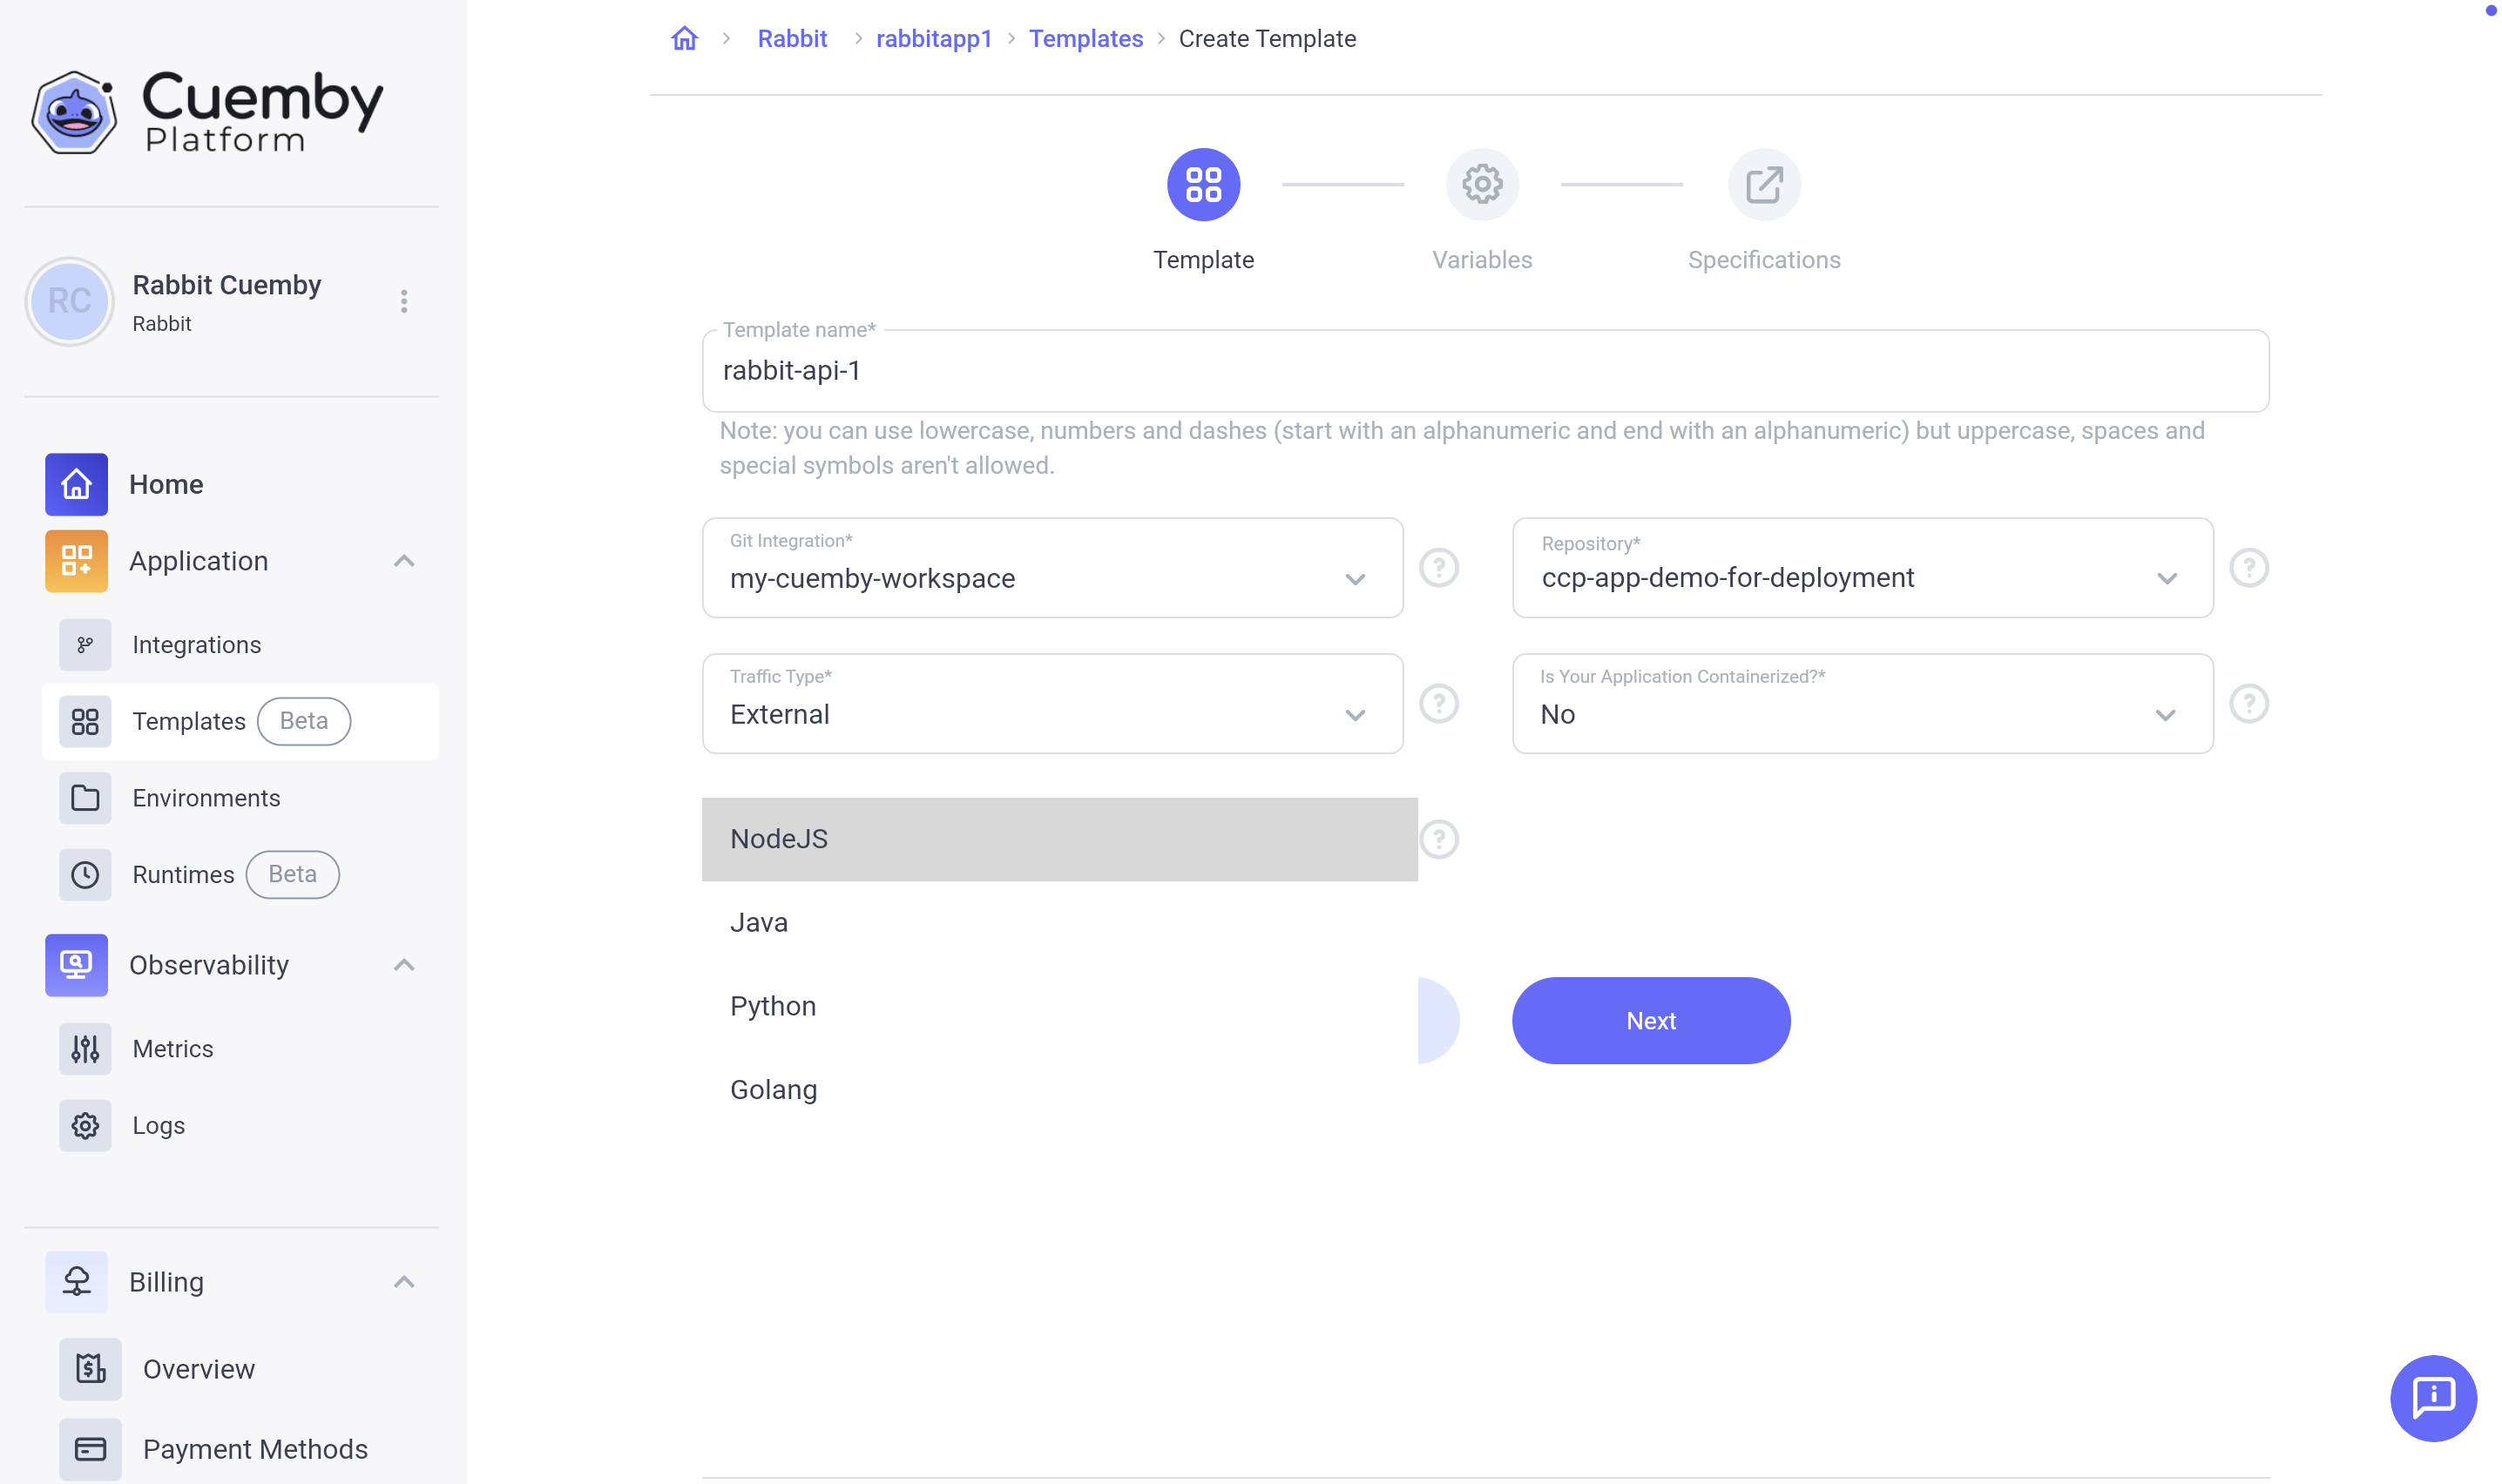
Click on “Next” to proceed.
3. Add Environment Variables.
Add variables for your application.

If storing sensitive information (e.g., API tokens), click the encrypt lock icon to encrypt the value.
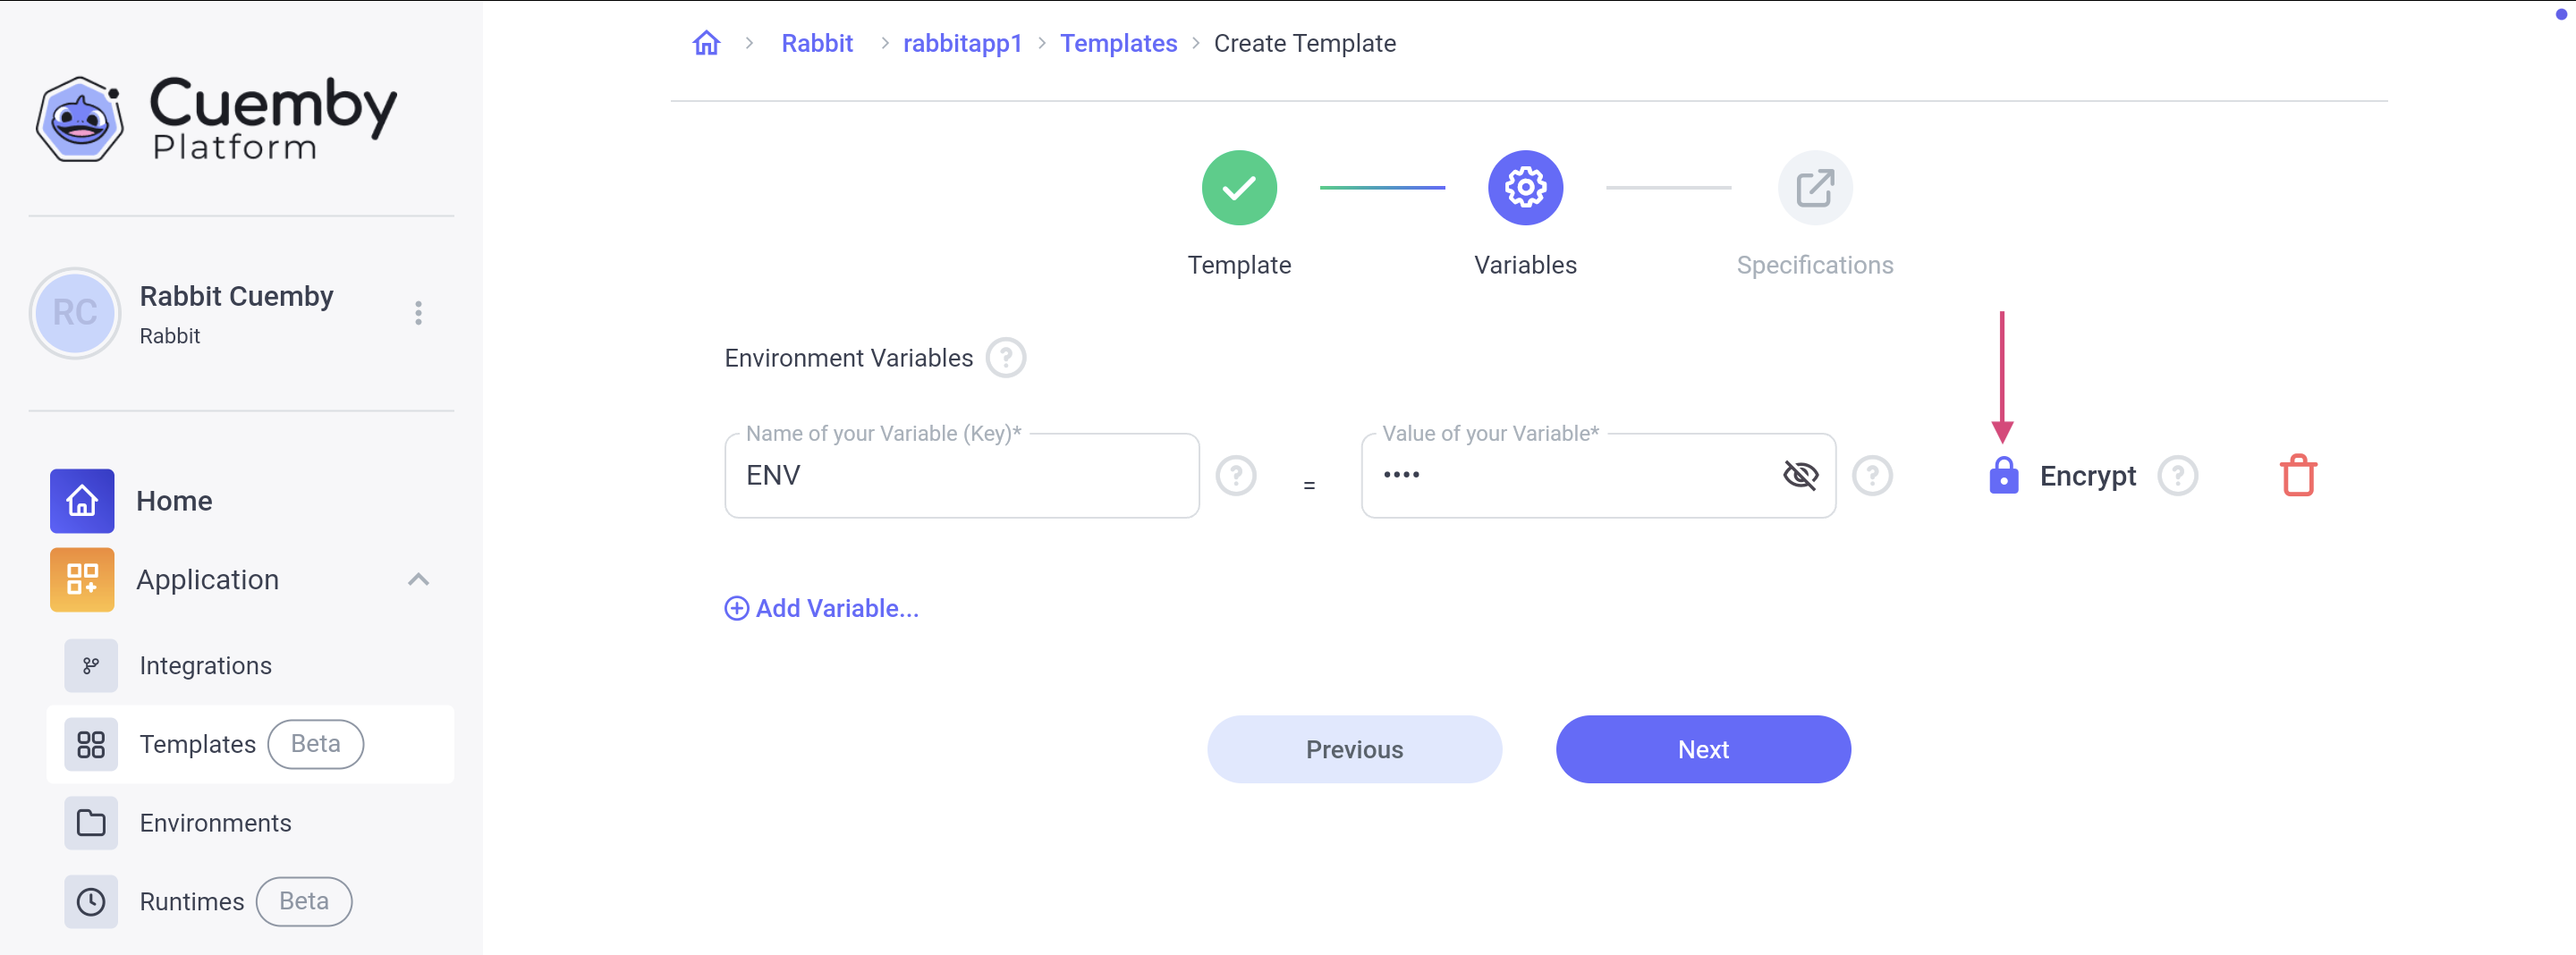
Click "Next" to proceed.
4. Add Specifications.
Instance Type – Select an instance type for your application. This determines the CPU and RAM allocation based on your app's needs:
| Instance Type | CPU | RAM |
|---|---|---|
| Extra Small | 100m | 128Mi |
| Small | 200m | 256Mi |
| Medium | 300m | 384Mi |
| Large | 600m | 768Mi |
| Extra Large | 1000m | 1024Mi |
Free Tier Users If you are on the free trial, the instance type is automatically set to Extra Small (100m CPU, 128Mi RAM). To check pricing for each instance type, refer to the Pricing Section.
Number of Replica – Specify the number of instances to run when scaling.
PORT - Enter the port where your application will be exposed.
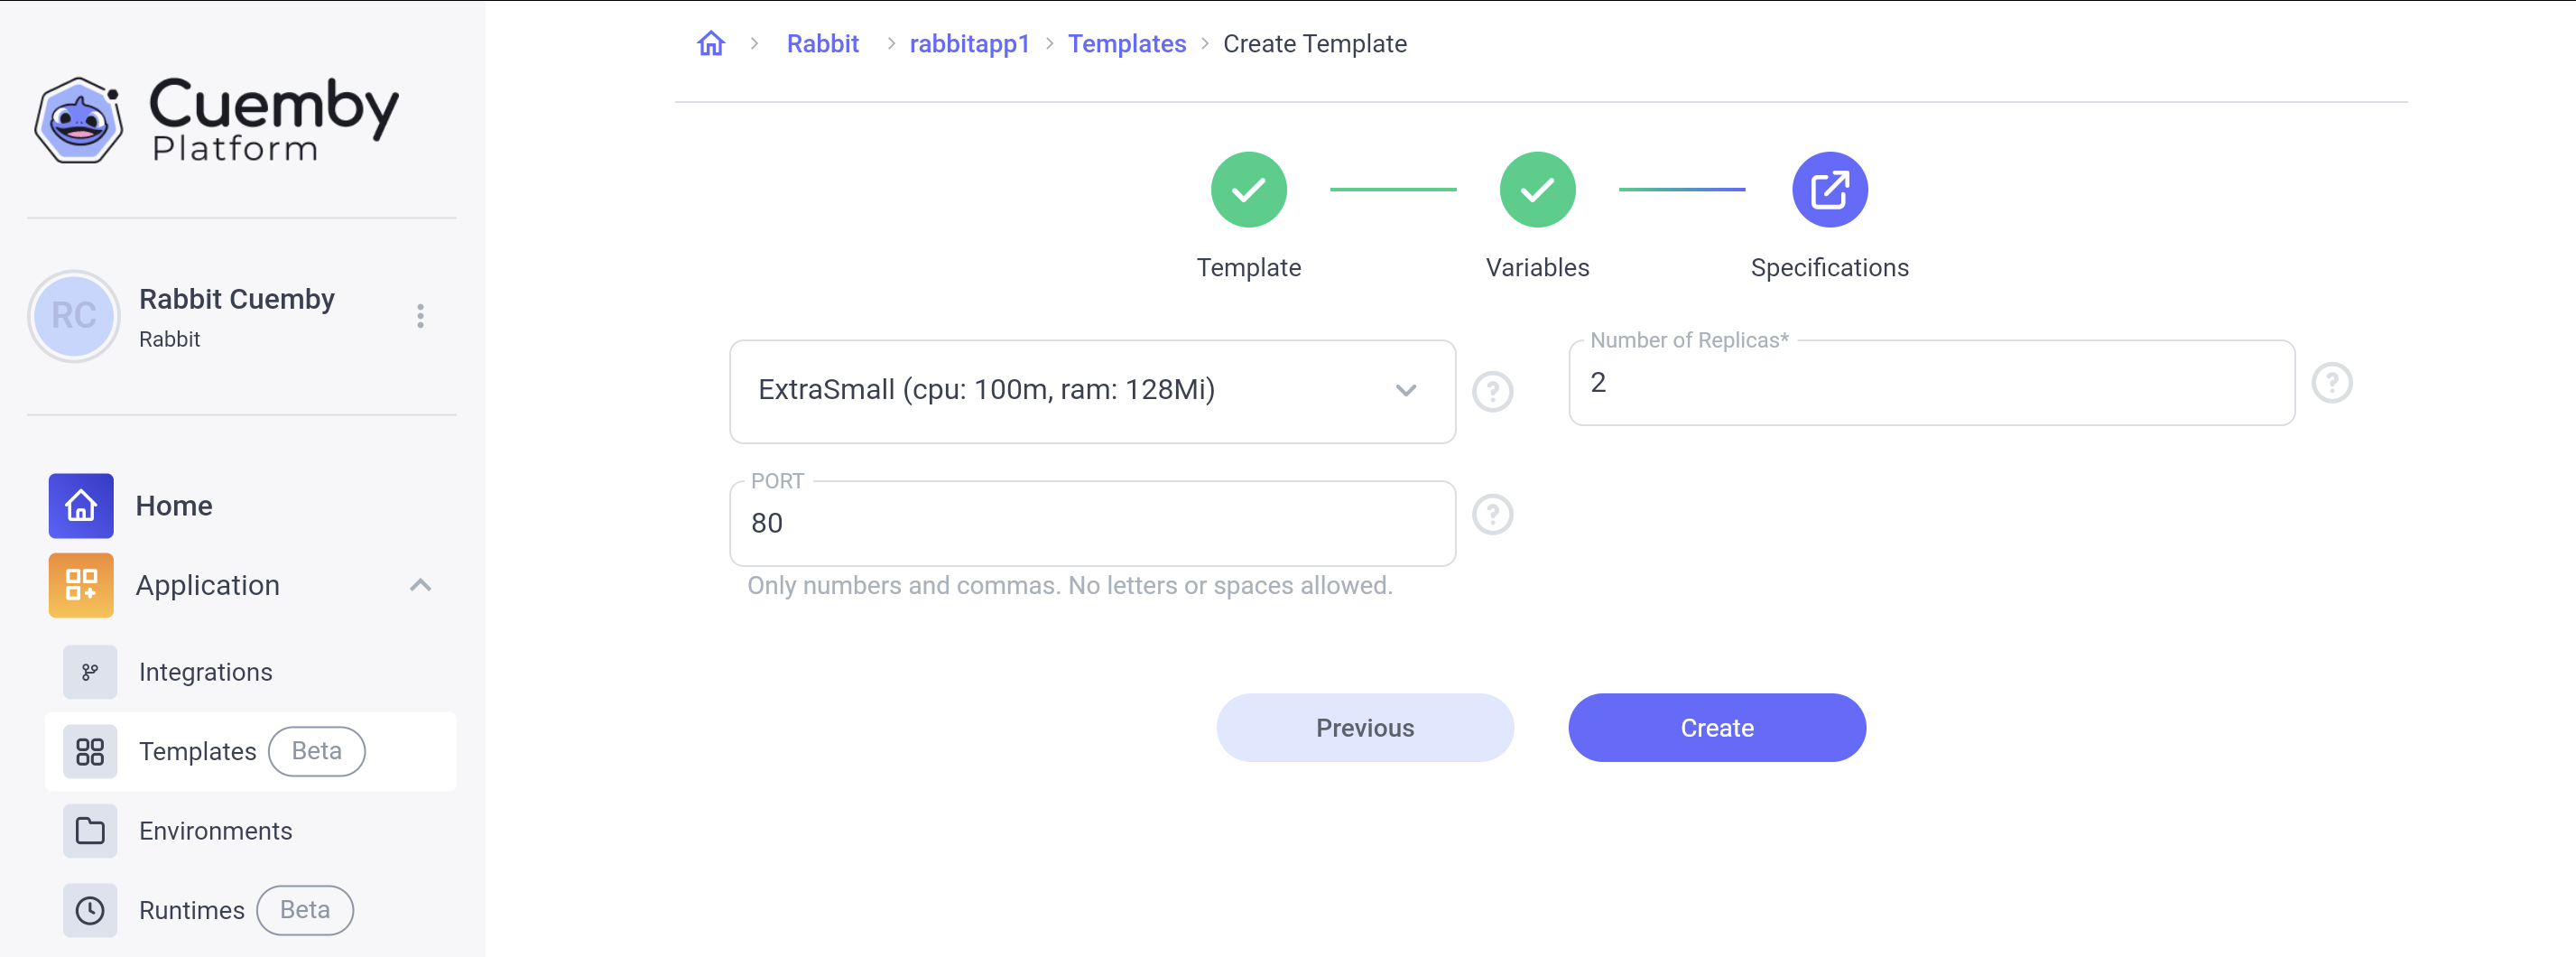
4. Final Step: Save & Proceed
Review your Application Template settings.
Click "Create" to finalize.
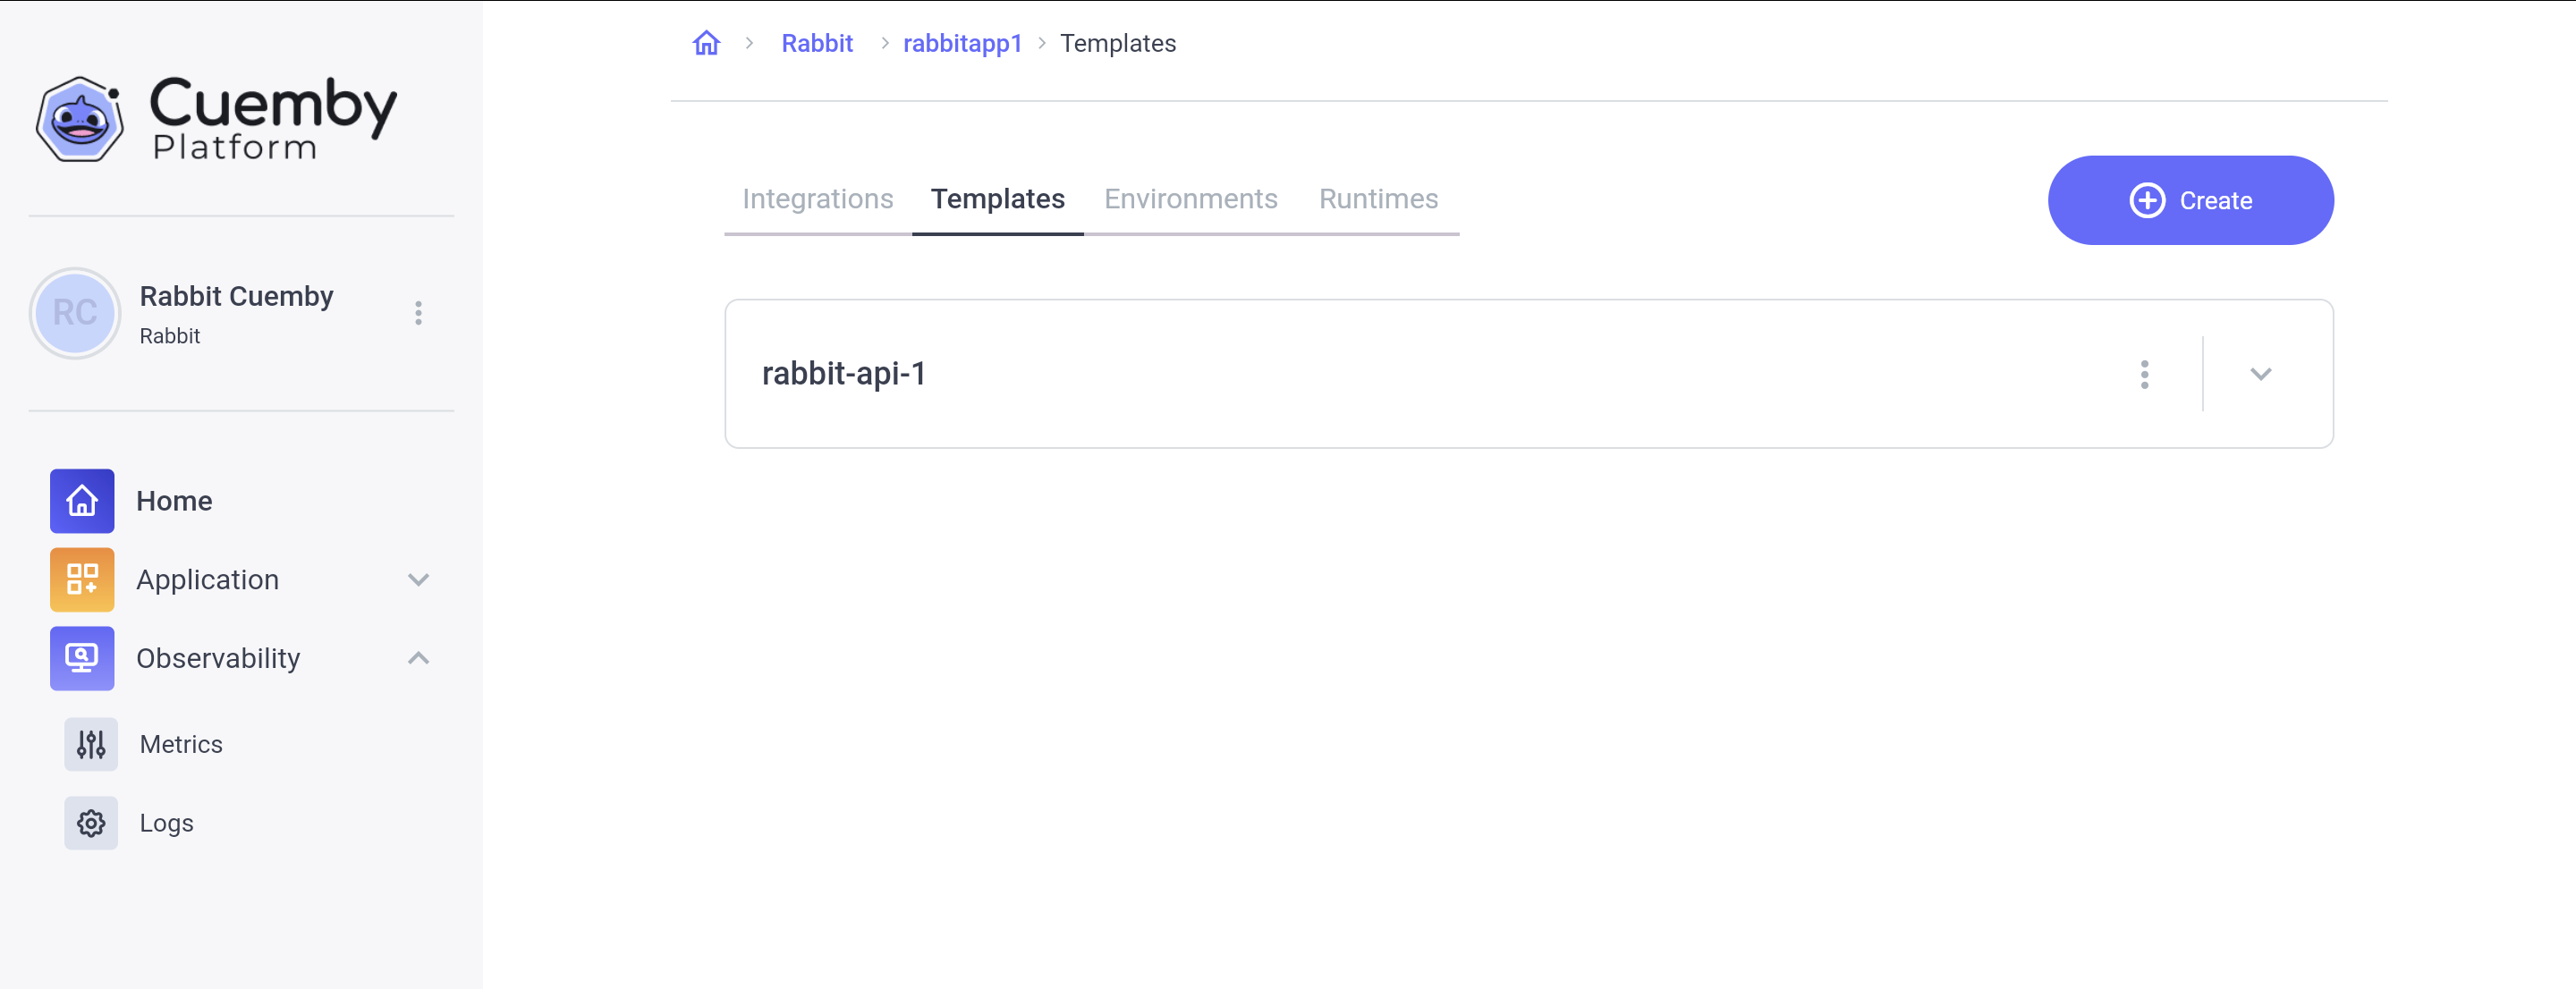
You have successfully created an Application Template!
You can expand the view to see the details of the Application Template you created.